The Idea
To create an interactive video where they will search for specific ingredients needed for a recipe. Guiding the viewers through the supermarket as they collect items like tomatoes, pasta, and herbs for a delicious dinner, or so that's how I want the viewers to think. This is just an "ordinary shopping" with a twist.
PROCESS
For Assignment 1, I wanted to give viewers a sense of presence and exploration. Transport viewers to different places or moment within the supermarket. Allowing viewers to explore their surroundings as if they were physically present. But also, to evoke emotions, more intensely than traditional videos. When viewers can look around and see the environment, so they feel more connected.
Planning
Rough sketch

Goal
- I want this short 360 film to give a sense of mystery and exploration. Making the viewers feel lost and confuse, and question why they are here.
Location: Woolworth (grocery store)
Target Audience: Adult, Teenager, Uni student
Idea 1 (edit)
- Each scene will be very inconsistent, adding glitch effect in between transition, then at the end fade to black. Showing a different location, e.g. bedroom, park, forest, etc.
- like the viewers woke up from the dream (shopping the grocery)
Idea 2
- Each scene will be in black and white, giving the impression/ illusion that it was shot in the 1990s, despite the fact that it was shot with cutting-edge technology.
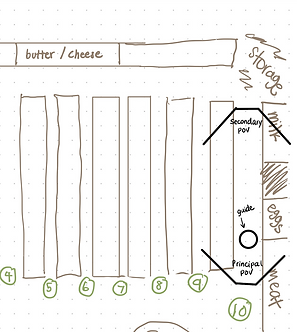
Floor Plan
Floor plan of Woolworth
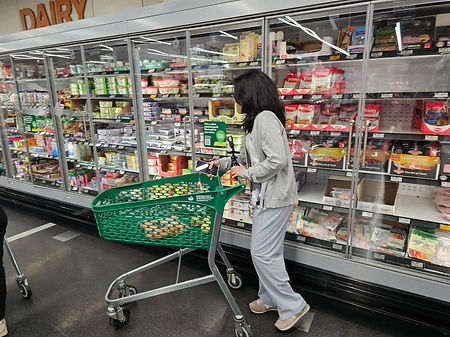
Entry of Woolworth
Vegetables section
Butter & Cheese section
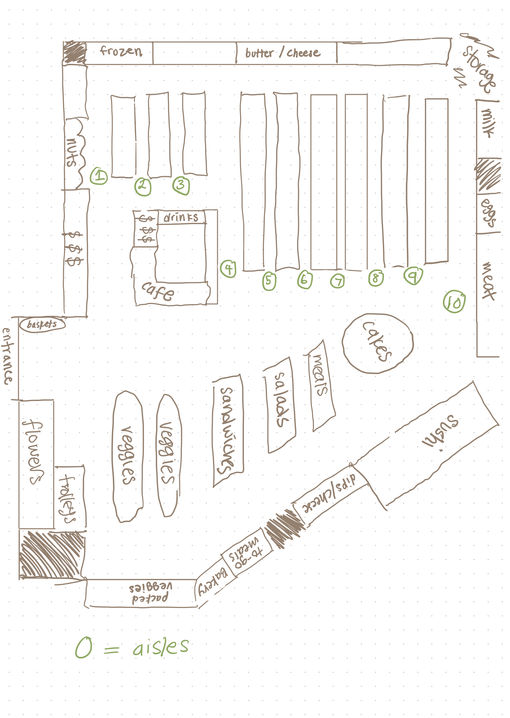
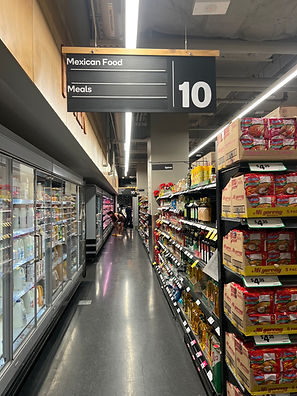
Sauce section
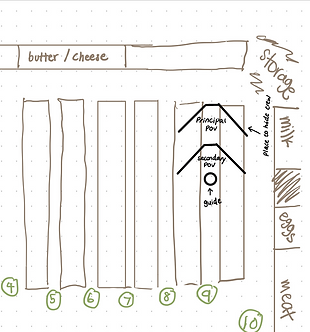
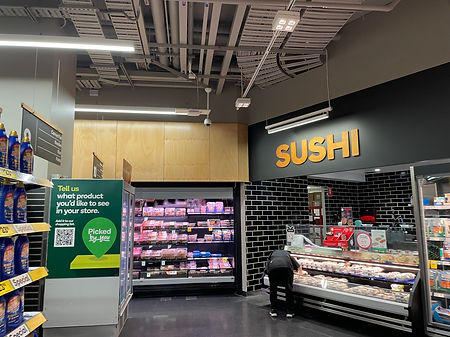
Milk & Meat section
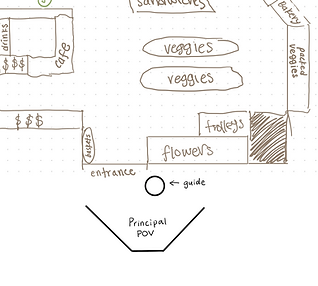
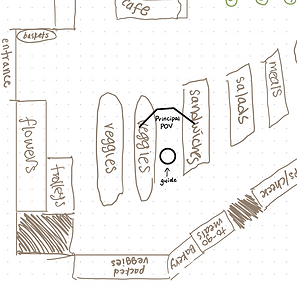
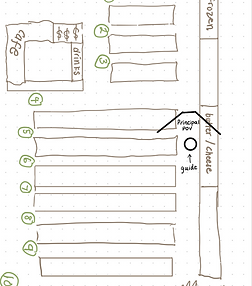
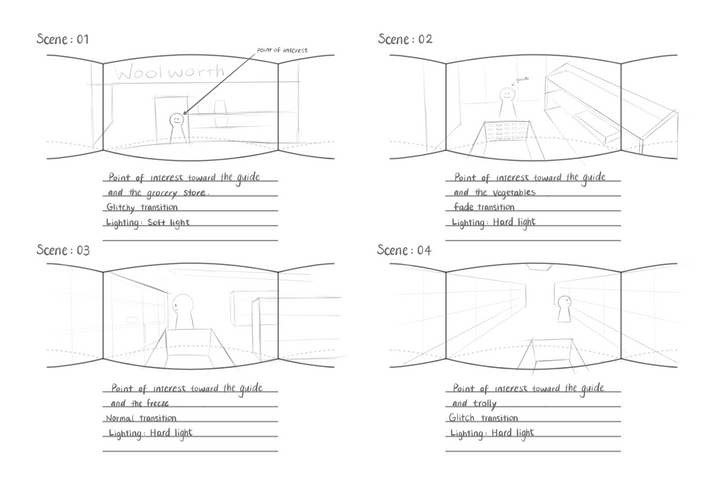
Storyboard

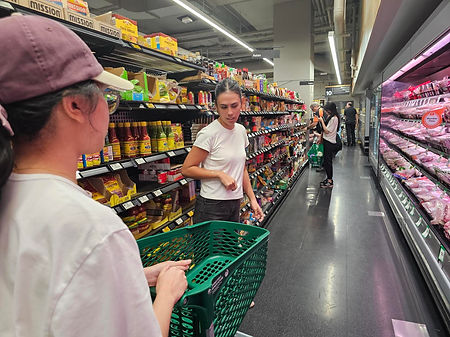
Filming


Post-Production
I will be using Adobe program for editing, specifically After Effects to remove and blur the 360 camera and Premiere Pro to add effects.
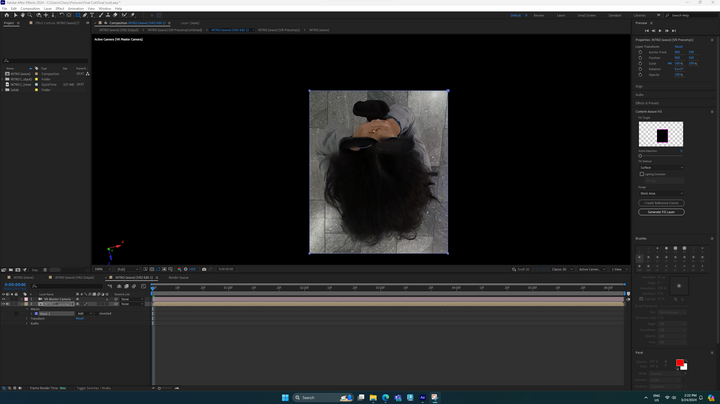
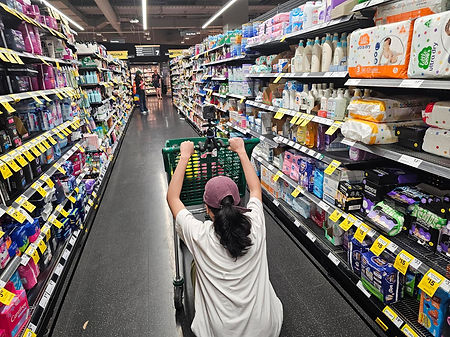
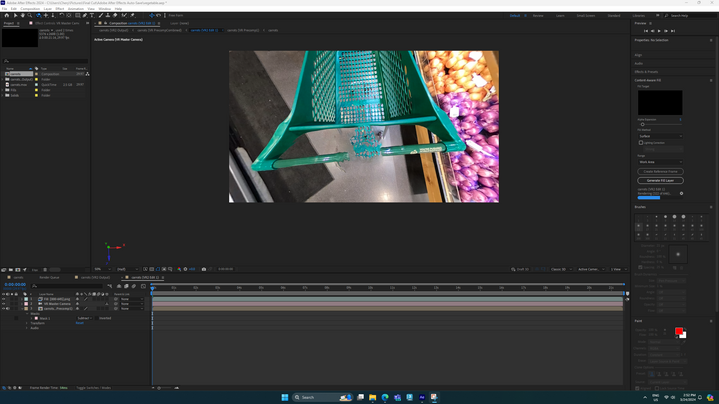
I start removing 360 camera in the introduction scene with Adobe After Effect. And as you can see our group member is holding onto the camera, since we are using a bendable mini tripod. I first select the area I want to fill using the content aware tool, where it will analyze and renders the frame using the Current-Time Indicator (CTI).
RESULT
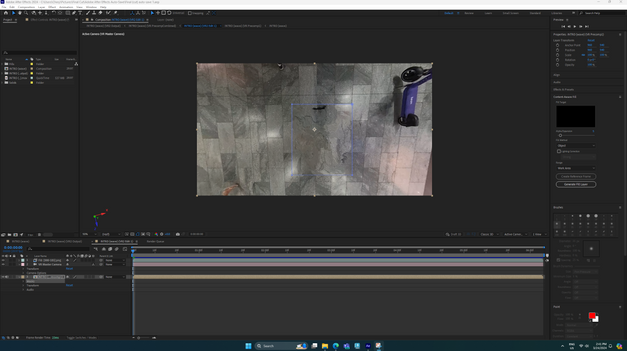
The image shows that the content-aware tool did not accurately replicate the floor patterns. And when the video was played, the selected area moves with the current state, was in fact because the person holding the tripod is moving.
Second Try (Final)
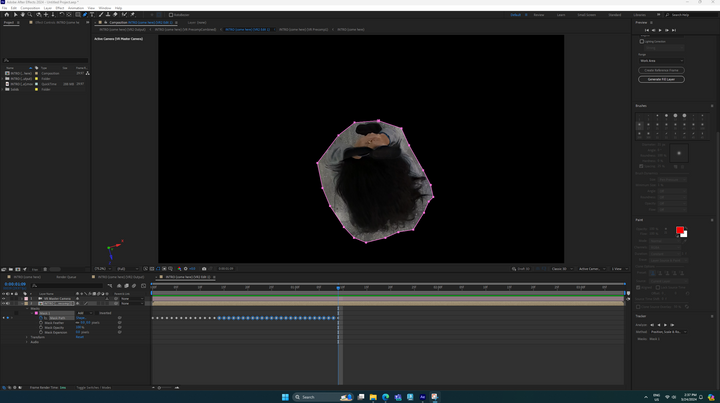
I've decided to give it another attempt because I wasn't fully satisfied with the first outcome. This time, I'm going to use the pen tool to minimize the selected area. As a result, I'm using the "Tracking" option to assist in monitoring the individual's movement. In the content-aware fill, I selected "Object", which basically removes the object from the video. This method will keep the floor from shifting along with the individual, which was an issue I found on my first attempt.
RESULT
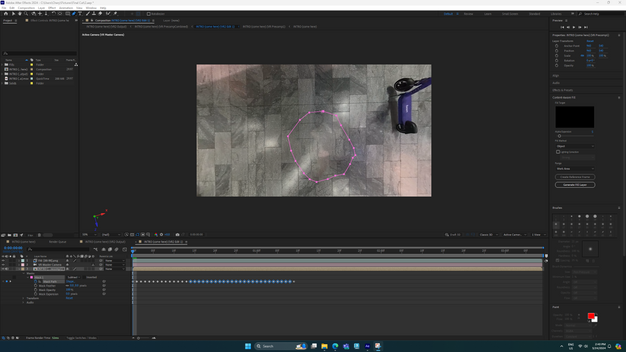
The final outcome is significantly improved compared to the initial attempt. However, the tile in the area appears to be disoriented. Despite this minor flaw, I believe this is the best result I can achieve under the circumstances. It's a testament to the progress I've made and the learning curve I've managed to navigate. While it's not perfect, but it's a clear improvement over my previous attempt.
Content Aware Tool
Now shifting to the footage captured with the camera mounted on a trolley. Initially, I used the same tool (content-aware fill), with the area selected on the 360-degree camera. However, it did not reference the anticipated background. I also experimented with different options within the content-aware tool, such as 'surface' or 'object'. The result remained unchanged, Despite these adjustments. It seems that the tool's limitations are evident in this context, but it's all part of the learning process in mastering these techniques.
Blur Tool
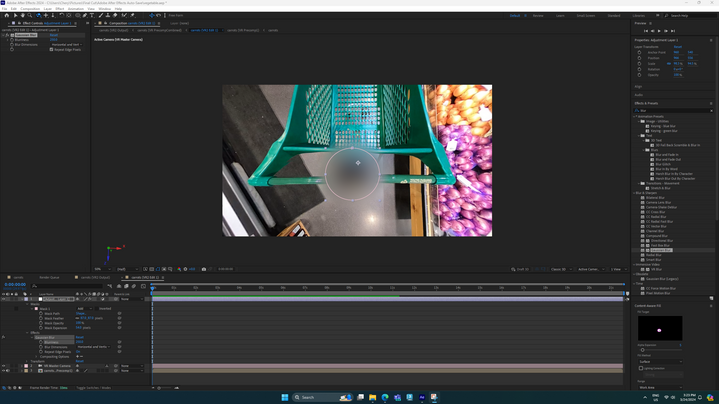
Since the content-aware tool give the best results, I decided that the blur tool technique would be a more suitable approach. I began by using the round pen tool to select the camera. Following this, I created an Adjustment Layer under the "layer" option. This method allows me to utilize the effects and presets. And choosing the Gaussian blur, which I dropped into the adjustment layer by dragging it. I then started adjusting the level of blurriness, setting it to 250.0. However, the camera was still noticeable (this varies with different footage; some may require an increase up to 400.0). I used the "Mask expansion" under the adjustment layer, which expands outside of the selected area, resulting in the image as seen.
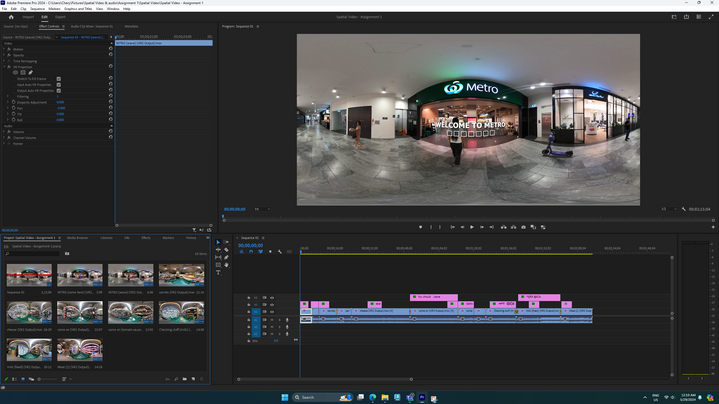
Begin my process by launching Adobe Premiere Pro, ready to infuse my project with effects and text. Initially, I import all the necessary footage and meticulously arrange it in my desired sequence. My next step involves trimming the clips to their optimal lengths. To align my video with the horror genre (as per idea 2), I introduce glitches and modify the color correlation to a stark black and white.
Once the editing phase reaches its conclusion, I turn my attention to the text overlays. I carefully adjust the size and visibility of the text to ensure that the subtitles are easily readable for the viewers.
In the final stage, I export the video in a high-resolution VR format (4K).